帮助中心
帮助中心

Windows下apache、tomcat、nginx配置多站点、绑定多域名
Apache
配置多站点:
1.让Apache在启动时能加载虚拟主机模块:
打开Apache安装目录下conf/httpd.conf文件,找到下面两行文字,把最前面的 # 号去掉,然后保存。
#LoadModule vhost_alias_module modules/mod_vhost_alias.so
#Include conf/extra/httpd-vhosts.conf 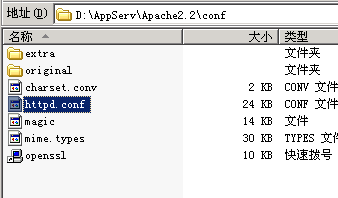
2.接着找到同一文件中的DocumentRoot和Directory,改为站点目录的上一级目录
例如站点放在 D:/Appserv/www/1 和 D:/Appserv/www/2,则改为以下形式
DocumentRoot"D:/Appserv/www"
<Directory"D:/Appserv/www">
3.配置完成后即可打开Apache安装目录下/conf/extra/httpd-vhosts.conf文件,在最后添加如下:
DocumentRoot是文件放置路径,ServerName是网站域名:
<VirtualHost*:80>
DocumentRoot"D:/Appserv/www/1"
ServerName www.xxx.com
</VirtualHost>
<VirtualHost*:80>
DocumentRoot"D:/Appserv/www/2"
ServerName www.xxx2.com
</VirtualHost>
绑定多域名:
用ServerAlias,要绑多少个域名都可以写在 ServerAlias 后面,用空格隔开即可
<VirtualHost*:80>
DocumentRoot"D:/Appserv/www/1"
ServerName www.xxx.com
ServerAlias xxx.com abc.xxx.com abd.xxx.com
</VirtualHost>
Tomcat
配置多站点:
一台服务器,需要配置多个web网站,只需要将tomcat 下面的 server.xml 中增加两个甚至是多个<Host>……</Host> 标签即可。其中需要注意的是每个web 项目的目录不要在同一个目录下,host标签中的 name 不能相同, 否则配置不成功
1. <Host name="example" debug="0" appBase="webapps" unpackWARs="true" autoDeploy="true"
2. xmlValidation="false" xmlNamespaceAware="false">
3. <Alias>www.example.com</Alias>
4. <Logger className="org.apache.catalina.logger.FileLogger"
5.
6. directory="logs" prefix="localhost_log." suffix=".txt" timestamp="true"/>
7. <Context path="" docBase="路径1" reloadable="true" caseSensitive="false" debug="0"></Context>
8. </Host>
9.
10. <Host name="example1" debug="0" appBase="webapps"
11. unpackWARs="true" autoDeploy="true"
12. xmlValidation="false" xmlNamespaceAware="false">
13. <Alias>www.example1.com</Alias>
14. <Logger className="org.apache.catalina.logger.FileLogger"
15. directory="logs" prefix="localhost_log." suffix=".txt" timestamp="true"/>
16. <Context path="" docBase="ROOT\\路径2" reloadable="true" caseSensitive="false" debug="0"></Context>
17. </Host>
绑定多域名:
<Alisa>……</Alisa> 标签内是放自己的域名,要绑多少个域名,就添加多少个标签即可
1. <Host name="example" debug="0" appBase="webapps" unpackWARs="true" autoDeploy="true"
2. xmlValidation="false" xmlNamespaceAware="false">
3. <Alias>www.example.com</Alias>
4. <Alias>abc.example.com</Alias>
5. <Alias>abd.example.com</Alias>
6. <Logger className="org.apache.catalina.logger.FileLogger"
7.
8. directory="logs" prefix="localhost_log." suffix=".txt" timestamp="true"/>
9. <Context path="" docBase="路径1" reloadable="true" caseSensitive="false" debug="0"></Context>
10. </Host>
Nginx
配置多站点:
Windows下的nginx 这里我是放在C盘根目录下的,目录结构如下:
C:\nginx\
├──conf
├──contrib
├──docs
├──html
├──logs
├──temp
└──nginx.exe
1.为站点创建配置文件
在nginx的目录下创建一个专门存放VirtualHost的目录,命名为vhosts_conf,可以把虚拟目录的配置全部放在这里。在里面创建名为e1.conf的配置文件并打开,往里面写:
server {
listen 80; #监听的端口号
server_name test1.com www.test1.com; #域名
#charset koi8-r;
#access_log logs/host.access.log main;
location / {
root e:/test/web1; #站点的路径
index index.html index.htm; #默认首页
}
#错误页的配置
#error_page 404 /404.html;
# redirect server error pages to the static page /50x.html
#
error_page 500 502 503 504 /50x.html;
location = /50x.html {
root html;
}
# proxy the PHP scripts to Apache listening on 127.0.0.1:80
#
#location ~ \.php$ {
# proxy_pass http://127.0.0.1;
#}
# pass the PHP scripts to FastCGI server listening on 127.0.0.1:9000
#
#location ~ \.php$ {
# root html;
# fastcgi_pass 127.0.0.1:9000;
# fastcgi_index index.php;
# fastcgi_param SCRIPT_FILENAME /scripts$fastcgi_script_name;
# include fastcgi_params;
#}
# deny access to .htaccess files, if Apache's document root
# concurs with nginx's one
#
#location ~ /\.ht {
# deny all;
#}
}
同样的方法,做web2的配置,这里命名为e2.conf,直接上代码:
server {
listen 80;
server_name test2.com www.test2.com;
#charset koi8-r;
#access_log logs/host.access.log main;
location / {
root e:/test/web2;
index index.html index.htm;
}
#error_page 404 /404.html;
# redirect server error pages to the static page /50x.html
#
error_page 500 502 503 504 /50x.html;
location = /50x.html {
root html;
}
# proxy the PHP scripts to Apache listening on 127.0.0.1:80
#
#location ~ \.php$ {
# proxy_pass http://127.0.0.1;
#}
# pass the PHP scripts to FastCGI server listening on 127.0.0.1:9000
#
#location ~ \.php$ {
# root html;
# fastcgi_pass 127.0.0.1:9000;
# fastcgi_index index.php;
# fastcgi_param SCRIPT_FILENAME /scripts$fastcgi_script_name;
# include fastcgi_params;
#}
# deny access to .htaccess files, if Apache's document root
# concurs with nginx's one
#
#location ~ /\.ht {
# deny all;
#}
}
这样,两个站点的配置就OK了。
2.在nginx的主配置文件里,包含这两个站点的配置文件。
打开conf目录下的nginx.conf文件,在http{...}段中的server段上面输入以下代码:
include c:/nginx/vhosts_conf/*.conf; #包含所有的虚拟主机的配置文件
最后重启nginx 即可
绑定多域名:
server_name 后绑定域名,多个域名用空格隔开即可
server {
listen 80; #监听的端口号
server_name test1.com www.test1.com; #域名
#charset koi8-r;
#access_log logs/host.access.log main;
location / {
root e:/test/web1; #站点的路径
index index.html index.htm; #默认首页
}